Heat Press Instruction Manual: A Comprehensive Guide
This manual details safe operation, setup, and troubleshooting for heat presses, enabling remote access to your PC via Windows’ Remote Desktop Protocol (RDP)․
Understanding Heat Presses
Heat presses are essential tools for applying transfers to various materials like fabrics and ceramics․ They utilize controlled heat and pressure for durable adhesion․ Understanding their function is key to successful results․ Remote Desktop Protocol (RDP) allows secure access to your computer, mirroring its display and functionality on another device․ This is useful for accessing files or controlling your heat press setup remotely․ Different press types cater to diverse needs, offering varying levels of control and convenience․ Mastering these presses unlocks creative possibilities, similar to mastering remote access for streamlined workflow․
Types of Heat Presses
Several heat press types exist, each suited for specific applications․ Clamshell presses open like a clam, ideal for beginners due to their simplicity․ Swing-away presses move the platen aside, offering better access and pressure distribution․ Draw presses feature a sliding lower platen, excellent for thicker materials․ Like enabling Remote Desktop Protocol (RDP) for remote access, selecting the right press type is crucial․ RDP mirrors your desktop, while the press type dictates transfer quality․ Understanding these differences ensures optimal results and efficient workflow, mirroring the benefits of remote connectivity․
Clamshell Heat Presses
Clamshell heat presses are popular for their user-friendly design and affordability․ The upper platen closes down onto the lower platen, applying heat and pressure․ Similar to establishing a secure Remote Desktop connection, proper setup is vital․ Ensure even pressure distribution and consistent temperature․ These presses are best for flat transfers on materials like t-shirts and mousepads․ While simpler than swing-away models, they require careful alignment․ Like RDP’s accessibility, clamshell presses offer convenient operation for various heat transfer projects․
Swing-Away Heat Presses
Swing-away heat presses offer greater versatility and safety compared to clamshell models․ The upper platen swings away from the lower platen, allowing for easy placement and removal of garments, much like accessing a remote desktop․ This design minimizes the risk of accidental contact during pressing․ They are ideal for thicker materials and multi-layered transfers․ Consistent pressure and temperature control, similar to a stable RDP connection, are crucial for optimal results․ Swing-away presses provide enhanced control and precision for professional heat transfer applications․
Draw Heat Presses
Draw heat presses utilize a sliding drawer mechanism for accessing the platen, offering a unique workflow․ Similar to remotely accessing files, the platen draws out, providing unobstructed access for garment placement and removal․ This design is beneficial for larger items or intricate designs requiring precise positioning․ Consistent, even heating is vital, mirroring the reliability of a secure remote connection․ Draw presses often feature digital controls for accurate temperature and time settings, ensuring professional-quality transfers every time․
Safety Precautions
Prioritizing safety is crucial when operating a heat press, akin to securing remote access to your computer․ Always wear heat-resistant gloves to prevent burns from the hot platen․ Ensure proper electrical grounding and avoid operating the press in damp environments․ Adequate ventilation is essential to dissipate fumes․ Never leave the heat press unattended during operation, and keep flammable materials away․ Following these precautions minimizes risks and ensures a safe working environment, much like robust RDP security measures․
Burn Prevention
Protecting yourself from burns is paramount when using a heat press․ Always utilize heat-resistant gloves and long sleeves to shield skin from the hot upper platen and transferred materials․ Exercise extreme caution when opening the press; avoid placing hands or body parts directly in front of it․ Be mindful of residual heat even after the timer ends․ Similar to securing remote access, proactive measures prevent potential harm, ensuring a safe and comfortable heat pressing experience․
Electrical Safety
Heat presses operate on high voltage; prioritize electrical safety at all times․ Ensure the press is properly grounded and connected to a compatible outlet․ Never operate a damaged power cord or plug․ Avoid using extension cords if possible, and if necessary, use a heavy-duty cord rated for the press’s amperage․ Like securing remote desktop connections, proper electrical setup minimizes risks․ Disconnect the press when not in use and during maintenance to prevent accidental shock․
Ventilation Requirements
Adequate ventilation is crucial when operating a heat press, as the process can release fumes․ Work in a well-ventilated area to prevent inhalation of potentially harmful vapors, similar to ensuring secure remote access protocols․ Open windows or use an exhaust fan to circulate air․ Avoid prolonged exposure to fumes, and consider a fume extractor for extended use․ Proper ventilation safeguards your health and maintains a comfortable working environment during heat pressing․
Components of a Heat Press
A heat press consists of several key components working in unison․ The upper platen applies heat and pressure, while the lower platen provides a stable surface․ A control panel & timer manages settings, and precise temperature control is vital for optimal results․ Understanding each part – akin to configuring remote desktop access – ensures efficient and safe operation․ These elements combine to deliver consistent, professional-quality transfers․
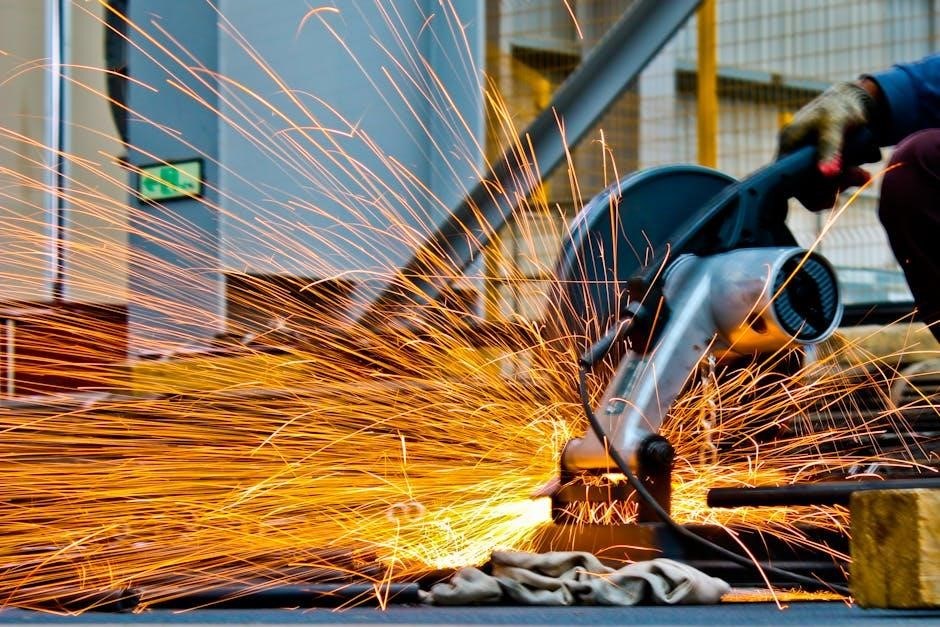
Upper Platen
The upper platen is the heated component that descends to apply both heat and pressure to the transfer material․ Its even temperature distribution is crucial, similar to a stable remote connection․ Constructed from cast aluminum, it ensures consistent results․ Adjustability allows for varying material thicknesses․ Regularly inspect for damage, ensuring safe and effective operation, much like maintaining secure RDP settings․ Proper platen function is paramount for quality transfers․
Lower Platen
The lower platen serves as the foundation for your heat pressing projects, providing a firm surface for materials․ Often coated with Teflon, it prevents sticking and facilitates easy transfer release, mirroring a smooth remote desktop experience․ It’s vital to ensure the lower platen is level for even pressure distribution․ Regular cleaning prevents residue buildup, maintaining optimal performance․ Inspect for scratches or damage that could affect transfer quality․
Control Panel & Timer
The control panel is the central hub for operating your heat press, allowing precise temperature and time adjustments․ A digital timer is crucial for accurate pressing cycles, similar to setting connection durations for remote access․ Familiarize yourself with all buttons and settings before operation․ Accurate timing prevents under or over-pressing, ensuring quality transfers․ Regularly check the timer’s calibration for consistent results, mirroring reliable remote connections․
Temperature Control
Precise temperature control is paramount for successful heat pressing, much like secure protocols for remote access․ Most presses feature adjustable thermostats; consistently monitor the actual temperature using an external thermometer for verification․ Different materials require specific heat settings – consult material guidelines․ Gradual temperature adjustments are preferred to avoid scorching․ Stable temperature ensures consistent adhesion, similar to a stable remote connection for data transfer․
Preparing for Your First Press
Proper preparation is key, mirroring the setup needed for secure remote access․ Begin with a dedicated, well-lit workspace, free from obstructions․ Select your desired transfer material – vinyl, sublimation, or others – ensuring compatibility․ Prepare your design digitally, mirroring or flipping as needed for correct application․ Verify all elements are ready before powering on the press, just as you’d confirm network settings before initiating a remote connection․
Workspace Setup
A dedicated workspace is crucial, akin to securing a remote access point․ Choose a stable, heat-resistant surface, away from flammable materials․ Ensure ample space around the press for safe operation and material handling․ Good ventilation is essential, similar to maintaining a secure network․ Keep a fire extinguisher nearby as a precaution․ Prioritize organization; a clutter-free area minimizes errors and maximizes efficiency, much like a streamlined remote desktop setup․
Material Selection
Choosing the right material is paramount for successful heat pressing, much like selecting compatible software for remote access․ Consider the fabric type – cotton, polyester, blends – as each requires specific temperature and time settings․ Ensure materials are pre-washed to remove sizing and wrinkles; Verify compatibility with your transfer type: sublimation, vinyl, or paper․ Always test a small sample first, mirroring a trial connection before full remote access, to avoid costly mistakes․
Design Preparation
Proper design preparation is crucial, akin to configuring secure remote access settings․ Mirror your image before printing, as it will be reversed during transfer․ Use high-resolution graphics for sharp results․ Ensure the design size accurately fits the intended garment area․ For sublimation, use specialized sublimation paper and inks․ Weed vinyl designs carefully, removing excess material․ A well-prepared design minimizes errors and ensures a professional, lasting finish, just like a stable RDP connection;
Setting Up the Heat Press
Correct setup, similar to enabling Remote Desktop Protocol (RDP), is vital for optimal performance․ Begin by powering on the press and allowing it to calibrate․ Consult a temperature setting guide based on your material – polyester, cotton, or blends require different heat levels․ Adjust the pressure knob to achieve firm, even contact․ Ensure the upper and lower platens are clean and free of debris before each use, mirroring a clean system setup for remote access․
Powering On & Initial Calibration
Similar to activating Remote Desktop Protocol (RDP) for remote access, proper initialization is key․ Plug in the heat press and switch it on; allow several minutes for the element to reach its setpoint․ Initial calibration verifies temperature accuracy․ Compare the displayed temperature with an external thermometer․ Adjust as needed using the control panel․ Consistent calibration ensures reliable transfer application, preventing issues like uneven heating or failed adhesion, just as a stable RDP connection ensures seamless remote control․
Temperature Setting Guide (by Material)
Accurate temperature, like a secure RDP connection, is crucial for success․ Polyester fabrics typically require 380-400°F (193-204°C) for sublimation․ Cotton demands 300-320°F (149-160°C) for heat transfer vinyl․ Poly-cotton blends fall between, around 310-330°F (154-166°C)․ Always consult transfer material instructions․ Lower temperatures prevent scorching; higher temperatures ensure proper bonding․ Initial tests on scrap material are recommended, mirroring testing a remote connection before full use․
Pressure Adjustment
Proper pressure, similar to a stable RDP session, is vital for quality transfers․ Light pressure suits delicate fabrics and prevents bleeding․ Medium pressure works well for most heat transfer vinyl applications․ Heavy pressure is needed for sublimation onto polyester, ensuring full ink transfer․ Adjust the pressure knob; too little results in poor adhesion, while too much can cause distortion․ Test on scrap fabric to find the optimal setting for each material․
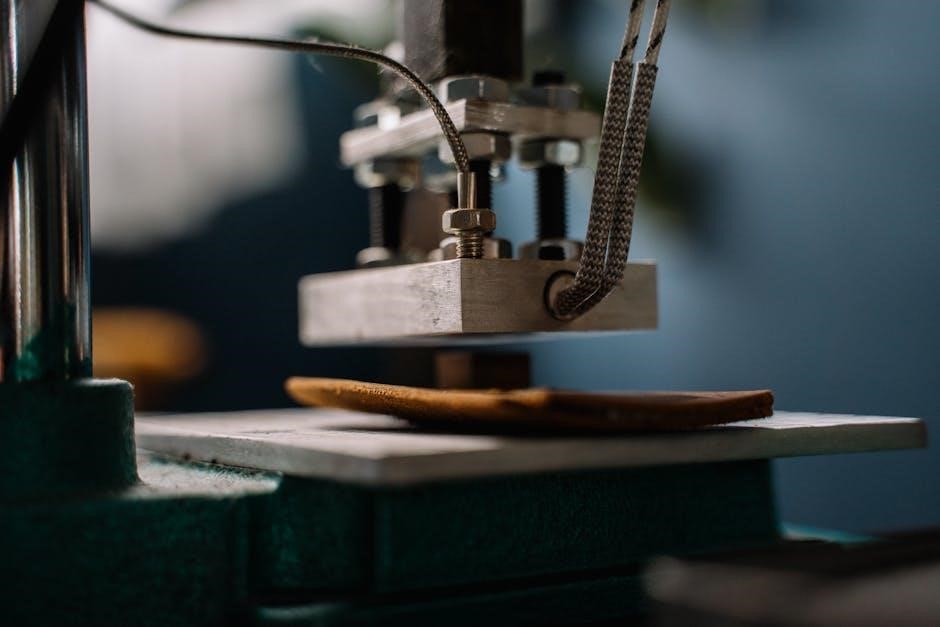
The Heat Pressing Process
Initiating the transfer, much like establishing a remote desktop connection, requires precision․ Position your transfer material carefully onto the fabric․ Close the heat press, applying the pre-determined pressure․ Refer to the pressing time and temperature chart for your specific material․ Once the timer concludes, gently lift the platen․ Carefully peel away the carrier sheet, revealing your finished design․ Allow cooling before handling to prevent damage․
Applying Transfer Materials
Precise placement is key, mirroring the careful setup of a remote connection․ Position the transfer, carrier sheet up, onto your chosen fabric․ Ensure proper alignment before applying heat and pressure․ Utilize heat-resistant tape to secure the transfer, preventing shifting during pressing․ Consider a Teflon sheet to protect both the material and the platen; This step ensures a clean, professional finish, much like a secure RDP session․
Pressing Time & Temperature Chart
Accurate settings are crucial, mirroring the precision of RDP configuration․ Below is a general guide; always test! Polyester: 385-400°F (196-204°C) for 45-60 seconds․ Cotton: 320-330°F (160-166°C) for 60-90 seconds․ Sublimation: 385-400°F (196-204°C) for 45-60 seconds․ Heat Transfer Vinyl: 305-320°F (152-160°C) for 10-20 seconds․ Adjust based on material thickness and transfer type․ Consistent monitoring is vital for optimal results․
Removing the Transfer
Careful removal prevents damage, akin to a secure RDP connection․ After the pressing cycle, immediately peel the carrier sheet – hot peel for some vinyls, cold peel for others․ If the transfer resists, repress briefly with light pressure․ Avoid forceful pulling, which can cause cracking or lifting․ Inspect thoroughly for adhesion; re-press if needed․ Proper removal ensures a durable, professional finish, mirroring a stable remote access setup․
Troubleshooting Common Issues
Addressing problems ensures quality, like maintaining a secure RDP connection․ Uneven heating often stems from inconsistent pressure or a faulty element; recalibrate and check platen evenness․ Transfers failing to stick indicate insufficient temperature, time, or pressure – verify settings․ Burn marks suggest excessive heat or prolonged pressing; reduce time/temperature․ Consistent monitoring and adjustments are key, mirroring proactive system maintenance for reliable remote access․
Uneven Heating
Consistent heat distribution is vital for quality transfers, much like a stable RDP connection․ Uneven heating often results from inconsistent pressure across the platen surface․ Ensure even distribution, and check the heating element for malfunctions․ Recalibrate the heat press, verifying temperature accuracy across the entire platen․ A warped platen or improper material placement can also contribute; address these issues promptly for optimal results․
Transfer Not Sticking
A failed transfer mirrors a dropped RDP connection – frustrating and requiring investigation․ Insufficient temperature or pressure are common culprits; verify settings against material guidelines․ Ensure the transfer is correctly positioned and firmly adhered to the fabric before pressing․ Consider the material’s composition; some require longer pressing times․ Check for moisture, as it hinders adhesion․ A faulty heating element can also cause this issue, requiring calibration or repair․
Burn Marks on Material
Burn marks resemble a corrupted RDP session – a clear sign of a problem․ Excessive temperature is the primary cause; immediately reduce heat settings․ Insufficient pressing time can also scorch materials, so adjust accordingly․ Using the wrong pressure can concentrate heat, leading to burns․ Always use a protective sheet like Teflon to prevent direct contact․ Verify material compatibility; delicate fabrics require lower temperatures and shorter durations․
Maintenance & Cleaning
Regular maintenance, like enabling RDP, ensures longevity and optimal performance․ After each use, allow the platen to cool completely before cleaning with a soft, damp cloth․ Avoid abrasive cleaners that can damage the surface․ Inspect the heating element for any signs of wear or damage․ Periodically check and tighten all screws and connections․ Proper storage in a dry environment prevents corrosion and extends the heat press’s lifespan․
Platen Cleaning
Consistent platen cleaning, much like maintaining a remote connection, is crucial․ Always disconnect the heat press and allow it to cool fully before cleaning․ Use a soft, lint-free cloth dampened with water or a mild detergent․ Avoid harsh chemicals or abrasive materials that could scratch the platen’s surface․ For stubborn residue, a specialized platen cleaner is recommended․ Ensure the platen is completely dry before resuming operation․
Regular Inspections
Like checking a remote desktop connection, frequent inspections are vital for longevity․ Examine the heat press for any signs of wear and tear, including frayed wires, loose connections, or damage to the platen․ Verify the control panel functions correctly and the timer is accurate․ Inspect the pressure adjustment knob for smooth operation․ Address any issues promptly to prevent malfunctions and ensure safe, consistent performance․
Long-Term Storage
Preparing for extended downtime, similar to securing remote access, requires care․ Clean the platens thoroughly, removing all transfer residue․ Disconnect the power cord and store it safely․ Cover the heat press to protect it from dust and debris․ Store in a dry, climate-controlled environment to prevent rust or corrosion․ Periodically check the unit, ensuring no moisture has accumulated during storage․
Advanced Techniques
Mastering heat pressing extends beyond basic transfers, much like enabling remote desktop access unlocks further PC utility․ Layering transfers creates complex designs, demanding precise timing and temperature control․ Teflon sheets and pads prevent scorching and ensure even pressure․ Understanding the differences between sublimation and heat transfer vinyl is crucial for optimal results, mirroring the need to choose the right RDP settings․

Layering Transfers
Achieving multi-colored or detailed designs often requires layering transfers, similar to building complex remote access configurations․ Begin with a base layer, pressing each subsequent layer with adjusted time and temperature․ Tackiness is key; a light initial press ‘tacks’ the first layer, allowing subsequent layers to adhere․ Use a Teflon sheet between each layer to prevent bleeding and ensure clean separation, much like secure RDP connections․

Using Teflon Sheets & Pads
Teflon sheets and pads are crucial for protecting both your materials and the heat press platen, akin to securing a remote desktop connection․ They prevent ink bleeding, scorching, and direct contact, ensuring a clean transfer․ Always use a Teflon sheet over your design, and a pad under for added cushioning․ Replace sheets when scratched or discolored, maintaining optimal performance, just as regular security updates are vital for RDP․

Sublimation vs․ Heat Transfer Vinyl
Sublimation and Heat Transfer Vinyl (HTV) are distinct heat-pressing methods, each suited for different applications, much like choosing between RDP and other remote access tools․ Sublimation infuses ink into the material, requiring polyester fabrics, while HTV applies a vinyl layer onto the surface․ Sublimation offers a softer feel, but HTV works on a wider range of materials․ Understanding these differences is key to achieving desired results․
Frequently Asked Questions (FAQ)
Here are answers to common heat press queries, similar to troubleshooting Remote Desktop Protocol (RDP) connections․ What temperature for sublimation? Typically 385-400°F․ How to prevent ghosting? Ensure proper pressure and pre-pressing․ Can a heat press handle multiple materials? Yes, but adjust time, temperature, and pressure accordingly for each material type․ Always test on scraps first for optimal results and safety․
What temperature should I use for sublimation?
Sublimation generally requires temperatures between 385°F and 400°F (196°C ౼ 204°C)․ This range facilitates the dye turning into a gas and bonding with the polyester fibers․ Precise temperature depends on the specific sublimation paper and fabric used; always consult their guidelines․ Similar to enabling Remote Desktop, careful setup is crucial for success․ Testing is vital!
How do I prevent ghosting?
Ghosting, or faint outlines around your design, often results from movement during the heat press cycle․ Ensure your transfer is securely positioned and use sufficient pressure․ Like setting up remote access, stability is key! Lowering the temperature slightly and extending pressing time can also help․ Proper pre-pressing to remove moisture is vital, mirroring the preparation needed for RDP connections․
Can I use a heat press for multiple materials?
Yes, heat presses are versatile! However, each material – cotton, polyester, ceramic, etc․ – requires specific temperature and time settings, much like configuring RDP for different Windows versions․ Always consult material-specific guides․ Using incorrect settings can cause damage, similar to a failed remote connection․ Adjust pressure accordingly; delicate fabrics need less force․
Leave a Reply