
Canopy Tent Instructions: A Comprehensive Guide
Quictent’s commitment to customer satisfaction shines through their detailed guidance, ensuring a comfortable and enjoyable experience with their 10×10 party tents (GM1200).
Understanding Your Canopy Tent Components
Before erecting your canopy tent, familiarizing yourself with its individual parts is crucial for a smooth and efficient setup process. A typical canopy tent, like the Quictent GM1200, consists of several key components working in harmony. The frame, usually constructed from steel or aluminum, provides the structural support.
This includes legs, roof sections, and connecting joints. The canopy top, made from durable polyester or polyethylene, offers shade and protection from the elements. Stakes are essential for securing the tent to the ground, preventing it from being blown away by wind. Finally, accessories like sidewalls, guy lines, and carrying bags enhance functionality and portability.
Understanding how these components interact – specifically noting how poles align with fittings, as Quictent emphasizes – will significantly simplify assembly and ensure a stable, secure shelter.
Identifying Tent Parts: Frame, Canopy, Stakes, and Accessories
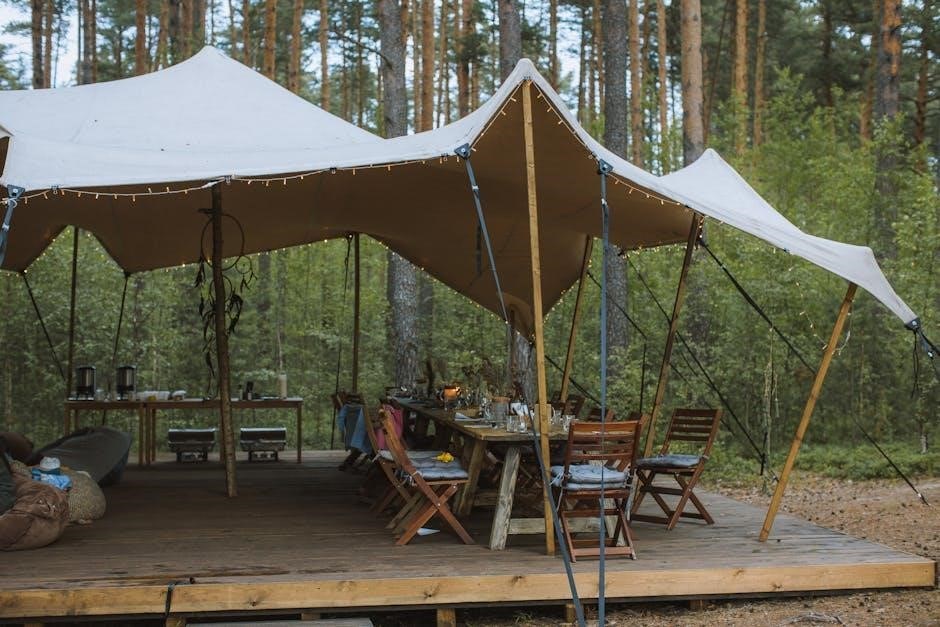
A complete canopy tent setup, such as the Quictent GM1200, comprises distinct parts, each serving a specific purpose. The frame, often telescopic, features interconnected legs and roof sections. Identifying the holes on the poles and fittings is vital for correct alignment during assembly, as Quictent instructs.
The canopy top, the fabric covering, shields from sun and rain. Stakes, typically made of steel or plastic, anchor the tent to the ground. Different ground conditions may require varied stake types for optimal hold. Accessories expand the tent’s usability; these include sidewalls for added enclosure, guy lines for increased stability, and a carrying bag for convenient transport.
Recognizing each component and its function ensures a successful setup and allows for efficient troubleshooting should any issues arise during use.
Types of Canopy Tents: Pop-Up vs. Traditional
Canopy tents broadly fall into two categories: pop-up and traditional. Pop-up tents, like the Quictent GM1200, are designed for rapid deployment, expanding automatically with minimal assembly. They excel in convenience, ideal for events requiring quick shelter. However, they may offer less structural rigidity compared to traditional models.
Traditional tents necessitate manual frame assembly, involving connecting legs and roof sections. This process, while more time-consuming, often results in a sturdier, more customizable structure. Traditional tents frequently allow for greater height adjustment and accommodate heavier-duty accessories.
The choice between pop-up and traditional depends on priorities. For ease and speed, pop-up tents are preferable. For robust stability and customization, traditional tents are the better option.

Setting Up Your Canopy Tent: Step-by-Step
Successfully erecting your canopy involves unpacking, assembling the frame with aligned poles, and securely attaching the canopy top for reliable shelter.
Step 1: Unpacking and Laying Out the Tent
Begin by carefully unpacking all components of your canopy tent, ensuring you have a clear and spacious area to work within. It’s crucial to inventory all parts against the manufacturer’s list – typically including the canopy top, frame sections (legs and roof supports), stakes, ropes, and any included accessories. Lay out the canopy top flat on the ground, protecting it from potential abrasions.
Next, separate the frame pieces, organizing them for easy access during assembly. Familiarize yourself with the different pole types and connectors. A smooth setup hinges on proper preparation; taking the time to lay everything out neatly will significantly streamline the subsequent steps. Double-check for any missing parts before proceeding, as this will save frustration later. Consider placing a tarp or ground cloth underneath the tent’s footprint to protect the canopy material.
Step 2: Assembling the Frame – Leg and Roof Sections
Commence frame assembly by connecting the leg sections, typically utilizing push-button locks or similar fastening mechanisms. Ensure each connection is secure and ‘clicks’ into place, providing a stable foundation. Next, extend the roof sections, carefully aligning the holes on the poles and fittings – as Quictent instructions emphasize – for proper alignment.
Gradually raise the frame, working systematically to avoid instability. It’s often helpful to have a second person assist during this stage. As you connect the roof sections, observe the overall structure, ensuring it’s symmetrical and balanced; Pay close attention to any pre-marked indicators on the poles, as these often dictate the correct orientation. A properly assembled frame is the backbone of your canopy, so prioritize accuracy and stability at this stage.
Step 3: Attaching the Canopy Top to the Frame
With the frame fully assembled, carefully unfold the canopy top. Position it over the frame, aligning the corner straps or Velcro attachments with the corresponding points on the frame legs. Begin securing the canopy, starting with opposite corners to ensure even distribution and prevent skewing.
Work your way around the frame, firmly attaching each strap or Velcro section. Ensure the canopy fabric is taut but not overly stretched, avoiding wrinkles or stress points. Quictent’s designs prioritize ease of use, so this step should be relatively straightforward. Double-check all attachments for security before proceeding, as a properly secured canopy is crucial for weather protection and overall stability. A snug fit will prevent flapping in the wind.
Securing Your Canopy Tent
Robust anchoring is vital; utilize stakes, guy lines, or weighted bags to counteract wind forces and maintain stability for a safe event space.
Staking Down the Tent: Proper Techniques for Different Ground Conditions
Successfully securing your canopy tent begins with understanding ground conditions. On soft soil, angled staking provides superior hold; drive stakes in at a 45-degree angle away from the tent. For hard or rocky ground, consider using a rubber mallet to avoid bending the stakes, and pre-drilling small holes can be beneficial.
Sandy conditions require specialized sand stakes, which offer a larger surface area to prevent pull-through. Always ensure stakes are fully inserted, leaving only the loop exposed for attaching the tent’s guylines or straps. Regularly check stake placement, especially during events, to ensure they haven’t loosened due to foot traffic or shifting ground.
Proper tensioning of the guylines is crucial; avoid over-tightening, which can stress the frame, and ensure even distribution of tension around the tent perimeter. Remember to use all provided stakes for maximum stability, even if the weather appears calm initially.
Using Guy Lines for Added Stability in Windy Conditions
Guy lines are essential for bolstering your canopy tent’s stability when facing breezy or windy conditions. These ropes, typically attached to the tent frame at designated points, extend outwards and are secured to the ground with stakes. Proper angling of guy lines – approximately 45 degrees – maximizes their effectiveness in resisting wind force.
Adjusting tension is key; lines should be taut but not overly strained, preventing damage to the tent frame. Utilize the adjustment buckles or sliders on the guy lines to fine-tune the tension. In particularly strong winds, consider adding additional guy lines for enhanced security, especially to corners and sides most exposed to the wind.
Regularly inspect guy line connections and stake positions throughout the event, re-tightening or re-staking as needed. Remember, guy lines distribute wind stress, preventing localized strain and potential tent collapse.
Weighting Down the Tent: Alternatives to Stakes (Sandbags, etc.)
When staking isn’t feasible – think paved surfaces, rocky terrain, or indoor setups – weighting down your canopy tent becomes crucial. Sandbags are a popular and effective alternative, providing substantial weight to anchor the tent legs. Distribute the sandbags evenly around the perimeter, focusing on each leg’s base for optimal stability.
Other options include water weights (containers filled with water), or even heavy objects like coolers or boxes, strategically placed. Ensure any alternative weights are securely positioned to prevent shifting or tipping. The amount of weight needed depends on the tent size and anticipated wind conditions; more weight is always preferable in exposed areas.
Remember to prioritize safety and stability; a well-weighted tent minimizes the risk of it becoming airborne or collapsing, protecting both people and property.

Maintaining Your Canopy Tent
Quictent prioritizes customer happiness, and proper tent care—cleaning, frame protection, and storage—will significantly extend its lifespan and ensure continued enjoyment.
Cleaning the Canopy Top: Materials and Methods
Maintaining a clean canopy top is crucial for longevity and appearance. Begin by gently brushing off loose dirt and debris with a soft-bristled brush. For more stubborn stains, a mild soap solution – think dish soap diluted in water – is generally effective.

Avoid harsh chemicals or abrasive cleaners, as these can damage the canopy material. Apply the soapy water with a sponge or soft cloth, working in circular motions. Rinse thoroughly with clean water, ensuring no soap residue remains.

Allow the canopy top to air dry completely before storing. For tougher mildew stains, specialized canopy cleaners might be necessary, but always test in an inconspicuous area first. Regular cleaning prevents buildup and keeps your canopy looking its best, contributing to Quictent’s promise of customer comfort and happiness.
Caring for the Frame: Preventing Rust and Corrosion
The metal frame of your canopy tent requires regular care to prevent rust and corrosion, ensuring its structural integrity. After each use, especially in damp conditions, thoroughly dry all frame components. Inspect for any existing rust spots and address them immediately with a metal rust converter or sandpaper followed by a rust-inhibiting paint.
Consider applying a protective coating, like a silicone spray or wax, to the frame before storage. This creates a barrier against moisture. Store the frame in a dry, well-ventilated area, avoiding direct contact with the ground.
Quictent prioritizes durability, but consistent maintenance is key. Regularly lubricating moving parts, like joints and connectors, will also prevent stiffness and extend the frame’s lifespan, upholding their commitment to customer satisfaction.
Proper Storage Techniques to Extend Tent Lifespan
To maximize the lifespan of your canopy tent, proper storage is crucial. Before storing, ensure the tent is completely dry – both the canopy top and the frame. Dampness leads to mildew and corrosion. Never store a wet tent! Disassemble the tent fully, separating the canopy from the frame.
Store the frame and canopy in separate, breathable bags or containers. Avoid tightly compressing the canopy, as this can cause creases and weaken the material. Choose a cool, dry, and dark storage location, away from direct sunlight and extreme temperatures.
Quictent designs for longevity, but following these guidelines will safeguard your investment, ensuring years of reliable use and upholding their dedication to customer happiness.
Troubleshooting Common Issues
Quictent prioritizes customer support, addressing potential problems like stuck pop-up tents or minor canopy tears to ensure a seamless and satisfying user experience.
Dealing with a Stuck or Difficult-to-Open Pop-Up Tent
Encountering a stubborn pop-up tent is a common frustration, but often easily resolved. Quictent understands this, and their instructions emphasize careful manipulation. Begin by ensuring the tent is fully laid out on a flat, clear surface, free from obstructions. Gently attempt to extend the legs, applying even pressure to all corners simultaneously.
If resistance persists, avoid forcing it, as this could damage the frame. Instead, carefully inspect the locking mechanisms on each leg, ensuring they aren’t prematurely engaged. Sometimes, a slight rocking motion, combined with gentle upward pressure, can help release the tension.
Crucially, if you’re still struggling, enlist a helper to assist with applying pressure to opposing corners. Remember, patience is key; a smooth, controlled opening is preferable to a rushed, potentially damaging one. Quictent designs for ease of use, and a little finesse usually does the trick!

Repairing Minor Tears or Damage to the Canopy
Addressing small tears in your canopy top promptly prevents further damage. Quictent prioritizes durability, but occasional wear and tear is inevitable with outdoor use. For minor rips or punctures, a canopy repair kit is highly recommended. These kits typically include adhesive patches specifically designed for the canopy material – often polyester or polyethylene.
Before applying a patch, thoroughly clean and dry the area around the tear. Cut the patch slightly larger than the damaged area, rounding the corners to prevent peeling. Carefully apply the adhesive to the patch, following the kit’s instructions, and firmly press it onto the canopy, ensuring a strong bond.
For larger tears, consider reinforcing the patch with a layer of durable tape on both sides. Quictent suggests regular inspection of your canopy to catch and address minor issues before they escalate, extending the lifespan of your investment.
Addressing Frame Instability or Collapsing
Frame instability or a potential collapse is a serious concern, demanding immediate attention. Quictent designs its frames for robust performance, but proper setup and maintenance are crucial. If you notice wobbling or bending, immediately evacuate the area and assess the situation.
First, ensure all frame connectors are securely locked into place. Re-check that the leg pins are fully inserted and that the roof supports are properly aligned. Tighten any adjustable components. If a leg is bent, it compromises the entire structure and requires replacement – do not attempt to repair a severely damaged leg.
Wind is a primary cause of instability; ensure adequate staking and guying (see related sections). Quictent recommends avoiding use in severe weather. If instability persists after these checks, discontinue use and consult a professional or contact customer support.
Safety Precautions When Using a Canopy Tent
Prioritize safety by avoiding canopy tent use during severe weather, like high winds or heavy rain, and always consider fire safety precautions diligently.
Avoiding Use During Severe Weather (High Winds, Heavy Rain)

Canopy tents offer excellent shade and shelter, but they are not designed to withstand extreme weather conditions. It is critically important to prioritize safety and avoid using your canopy tent during periods of high winds, heavy rain, or approaching storms. Strong gusts can easily lift and potentially collapse the tent, causing injury to occupants and damage to the structure itself.
Even seemingly stable tents can become dangerous projectiles in severe weather. Always monitor weather forecasts before and during events where a canopy tent is in use. If inclement weather is predicted, proactively disassemble the tent and store it securely. Remember, a damaged or collapsed tent is far more costly – and dangerous – than the inconvenience of taking it down. Prioritize personal safety above all else when considering canopy tent usage.
Fire Safety Considerations with Canopy Tents
Canopy tent materials, typically polyester or polyethylene, are often highly flammable. Therefore, exercising extreme caution regarding open flames and heat sources is paramount when using a canopy tent. Never use propane heaters, grills, or any other devices producing open flames inside or directly near the tent. Sparks from barbecues or even cigarettes can easily ignite the canopy fabric, leading to a rapid and dangerous fire.
Maintain a significant, clear distance – at least ten feet – between any heat source and the tent structure. Consider using battery-operated lighting instead of candles or lanterns. Ensure a readily accessible fire extinguisher is nearby in case of an emergency. Be mindful of surrounding dry vegetation, as it can also contribute to fire hazards. Prioritizing fire safety will help ensure a secure and enjoyable experience.
Proper Ventilation to Prevent Condensation Build-Up
Condensation within a canopy tent can create an uncomfortable and potentially damaging environment. Proper ventilation is crucial to mitigate this issue. Ensure adequate airflow by opening side walls or vents, if your tent is equipped with them. This allows moist air to escape and prevents water droplets from forming on the canopy’s interior.
Even with open vents, humidity can still accumulate, especially in cooler weather or during rainfall. Consider utilizing small fans to circulate air within the tent, further reducing condensation. Avoid completely sealing the tent, as this traps moisture. Regularly check for and wipe away any condensation that does form to prevent mildew or damage to the tent fabric. Good airflow equals a drier, more pleasant space.
Leave a Reply